
Simplifying Notion: A Beginner's Guide in 6 Easy Steps

I first heard about Notion when I was doing research for my Etsy shop. This thing called “Notion” kept popping up and my research showed that the demand (aka: number of people searching) for this then foreign-to-me-word was so high.
And maybe like me, you’ve been seeing the word “Notion” pop up everywhere recently as everyone and their dog seem to be getting on the bandwagon (for good reason!)
There was no doubt I had to know more. When I saw that it was an online workspace platform (similar to the likes of Asana or Trello or ClickUp) I realized that Notion and I were going to be best buds. Thus began my journey to learn how to use the platform, discover what it could do and how to set it up effectively in order to make the most of it.
If you haven’t yet seen the flurry of chit chat about Notion or just haven’t taken a look-y-loo at it yet, in short it’s an all-in-one online productivity and project management software tool. It’s a space you can use to create customized workspaces where you plan, write, organize, manage and collaborate on any and all of your projects and tasks.
It includes tons of tools like calendars, databases, lists, tables, Trello-esque boards, timelines, deadline tracking, embedded content, web links, images (giving it so much aesthetic appeal!) and even notifications so you can set up auto-reminders for yourself of the most important things on your plate.
And the best part: the free version is likely all you need if you’re a solopreneur or the only one that needs to access whatever is within your Notion account!
This article contains affiliate links — which means I may earn a small commission on products I recommend. You’re helping me afford my coffee habit and I’m getting to share my favorite stuff — win-win!
How To Use Notion In 6 Easy Steps:
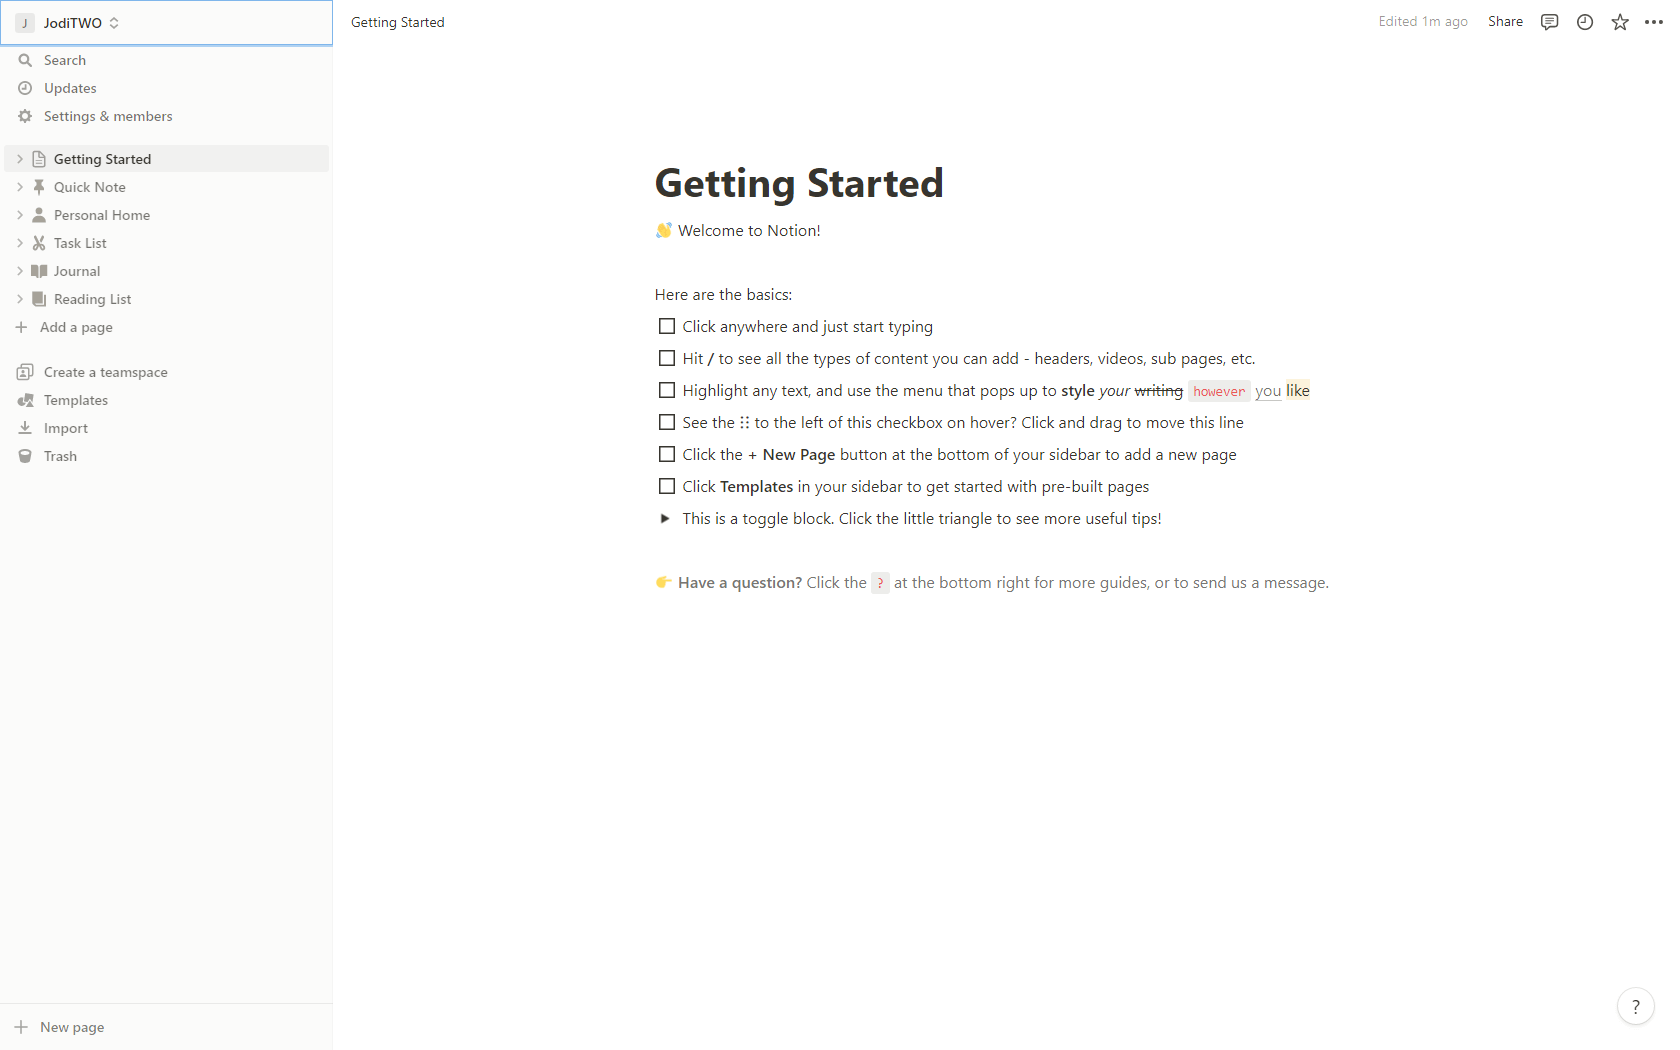
01. When you initially sign up and login to your Notion account, the first thing you’ll see is your personal workspace.
Within the workspace, your “pages” will be visible in the left-hand sidebar. The screen will otherwise be literally white and blank (a beautiful canvas) but Notion sets you up with a handy “Getting Started” page and a few sample templates. Take a few minutes to click on and explore those because that alone can teach you a ton about how Notion functions, how to set things up and will probably start to spark some ideas about what you want to create yourself.
02. Then, take a deep breath.
The possibilities of what Notion can do can get overwhelming real fast. Know that you will eventually feel comfortable in this space, it just takes a bit of time to learn. You’ve got this!
03. Next, create a new page.
This “sandbox” page is for the sole purpose of learning, exploring, and experimenting. To do that just click “+Add a page” near the bottom of the left-hand sidebar.
This way, if you hit the wrong button or something tweaks out and you don’t know what the heck happened (or accidentally delete something which I did many times in my learning phase), it’s no big deal because this is just a testing space.
Play around and try new things here, not within the pages you’re actually going to use and where your real content and data will live.
04. On your new fresh page, go through each “block” option one by one.
Think of Notion blocks as building blocks: they provide you with options for formatting, sorting, and viewing the content of your page.
To pull up the blocks, click anywhere on your blank page and type a forward-slash “/”. All of the available block options will pull up in a scrollable menu. Start with the top-most option (“Text”) and work your way down the list.
Again, go one-by-one and focus on just one block at a time instead of rushing through the options which will just be confusing and overwhelming.
05. Take your time with this process because it’s a huge learning curve for most of us.
But there’s a huge payout in the long run as it’ll make it so much easier for you to create your own custom workspaces that fit your exact needs. The more you learn now the clearer you’ll be on what you need from Notion and precisely how Notion can help you do it.
06. If you’re still feeling overwhelmed or confused…
If looking at that blank white slate and the sample templates, you’ve got two options:
If you learn best by watching: check out some YouTube tutorials (there’s no shortage of them!)
If you learn best by doing: get some more complex and in-depth templates that others’ have put together (again there are plenty out there to choose from!) This is what allowed me personally to learn how Notion worked and the quickest way I figured out how to put my own pages together.
Conclusion
Notion is an incredibly versatile platform with so much functionality, almost anything is possible!
And playing with that blank white canvas is so much fun and honestly, it feels so rewarding when you discover how to do something new.
But the biggest takeaway for newbies to Notion is to take it slow, start with some templates and set aside the time to learn how the platform operates – you’ll be so glad you did!
Thank you to Jodi Graham for this guest post!

Jodi is a Productivity Coach and she's the person you go to when you need to save time and get more done! Through her eCourses, printables and templates she helps overwhelmed biz owners to get organized, save time and make quicker progress on their goals.
Jodi believes that in order to experience life to the fullest, you’ve got to be productive and intentional with your time. Experiences are unlimited, time is not so make the most of your life by making the most of your time.
